
Recently a friend of mine asked if I could make a couple of pram liners for her. We shared a flat at one stage, she was my beautiful bridesmaid, we were pregnant at the same time, her first son is only a few days older than Little Monkey, and her youngest son is oh so adorable! So how could I say no?
So, While she was sleeping, I made a couple of reversible pram liners for my beautiful friend. Here is one. Check it out!


I was pretty happy with how it turned out. Plus, it was not difficult to make.
Even if you are new to sewing, you CAN make a pram liner :) This projects will give a new sewist a chance to practice making buttonholes... Lots of buttonholes! Would you like to know how I made these pram liners? It's easy! Click Read more!
You will need:
- paper
- pencil
- measuring tape
- ruler
- fabric and paper scissors (do you know that cutting paper with fabric scissors is a deadly sin? - my husband does... now)
- fabric (I chose two contrasting quilting cotton fabrics)
- pre-washed wadding (I think mine is bamboo/cotton blend or it could be 100% bamboo. I gently pre-washed it by hand in warm water, let it dry flat, then pressed)
- thread
- pins
- seam ripper
OK, as always, I started with making a pattern. I borrowed my friend's pram seat for one night to make a pattern. Now, picture me standing there in front of a pram seat with my baking paper, measuring tape and a pencil. I first tried measuring everything - the length, the width, the distance from one strap to another, etc, and transferring measurements on paper. I looked at what I ended up with and realised I needed to think of a different way to take the measurements. I only had the seat for one night and I actually was planning on catching some zzz's as well!
"Make a muslin template before you cut your fabric" is something I hear a lot. So I thought that maybe instead of making a paper pattern and then a muslin copy, I would make a 'muslin' and use it to make a paper pattern. Twisted thinking.
So, I started all over again. I measured the length and the width of the seat and cut out a rectangle out of fabric using these measurements. Pictured liner is for a Baby Jogger City Select and it is 76 cm x 32 cm with 1 cm seam allowance included, or 29.9" x 12.6" with 0.4" seam allowance included.
I put my lovely colourful fabric inside the seat, marked the location of each strap and loop using a pen, then took my scissors and very carefully cut the fabric along the marked lines. Doing things this twisted way allowed me to see how fabric 'sits' in the seat which allowed for a more precise positioning of buttonholes.


Then I took my 'muslin' out and transferred all measurements onto paper.

Phew! A reliable pattern!
I then traced my pattern on fabric and cut one piece out of wadding and two pieces out of quilting cotton.

Then I needed to transfer the lines onto my fabric. I am sure there is a proper way of doing it. I just don't know it. I placed one piece of fabric face up (brightly coloured side up) on the carpet, placed paper pattern on top, and used my pins to mark the beginning and the end of each line.

Next, I carefully removed pins one by one marking where they were with my pencil and then connecting them by drawing a line from one dot to the other using a ruler.

Now it was time to sew! Whoo hoo! I placed the three layers in this order: wadding at the bottom, then two layers of quilting fabric on top of each other with right sides facing (meaning, with brighter coloured sides together). Just like I did for the coffee cup cosy and electronics case.

Pinned the three layers.

Stitched around leaving a small opening on one of the sides. I didn't even need to use a walking foot.

Trimmed the corners.
Turned the liner right sides out.

Then turned the raw edges on the opening towards the inside of the liner and pressed it.

Nice!

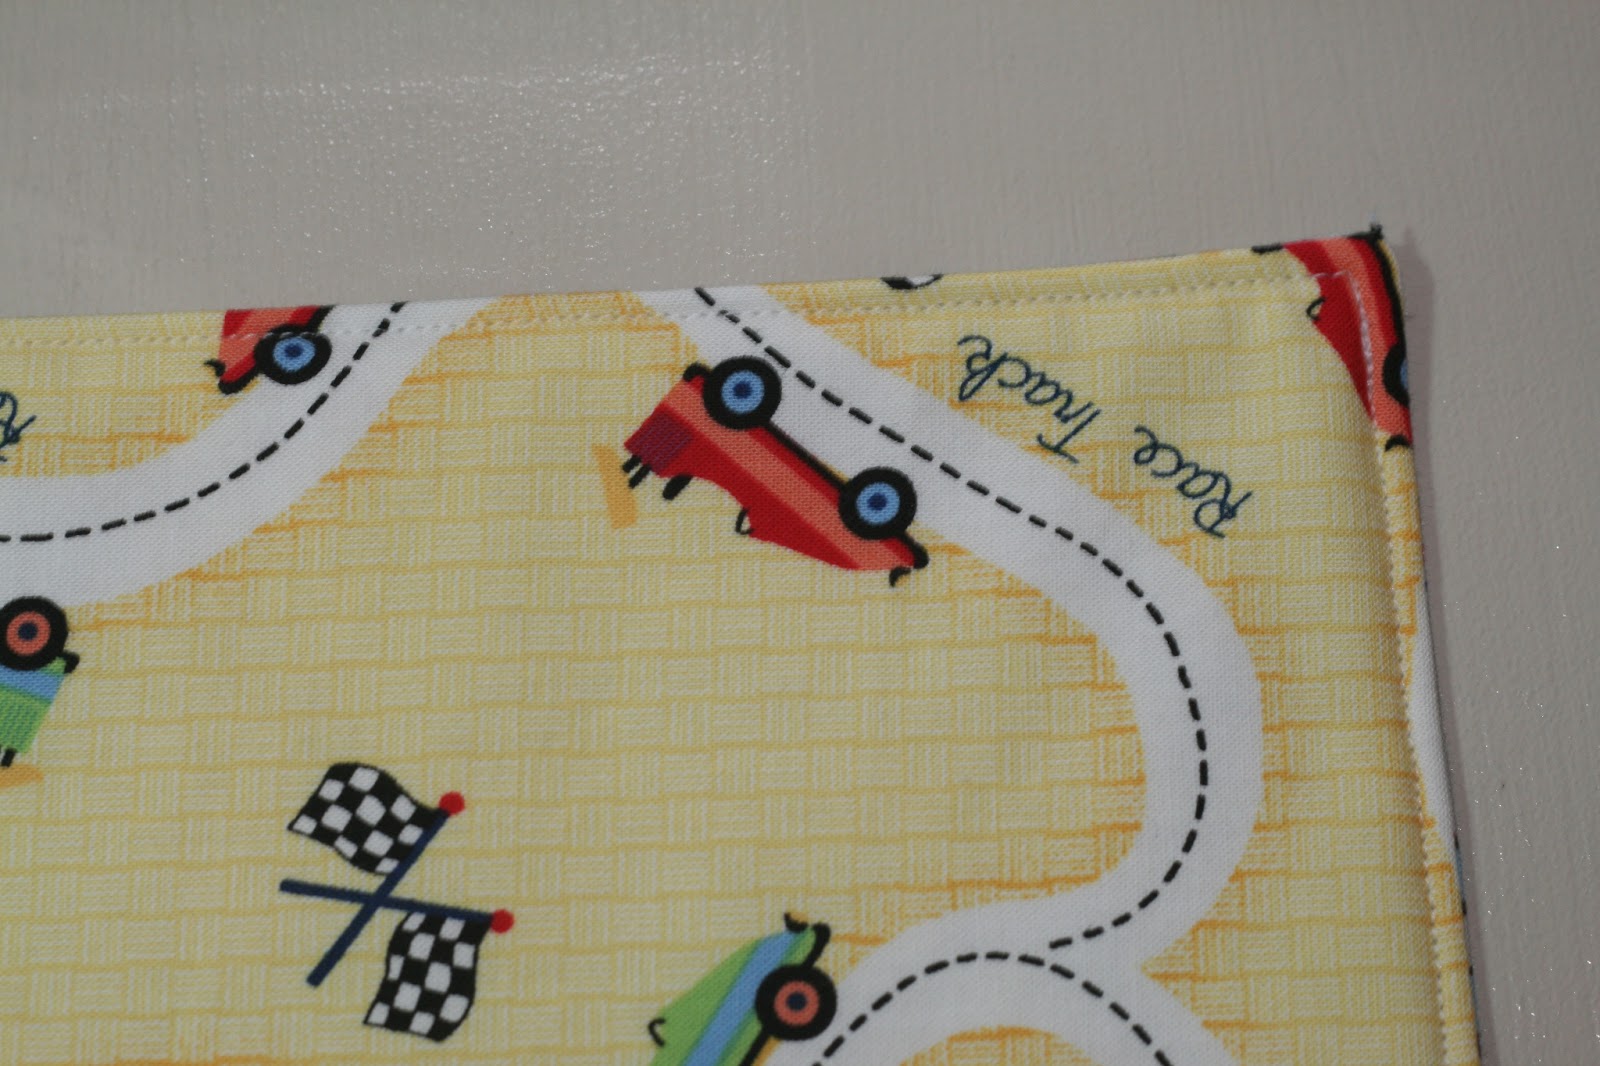
Then top-stitched close to the edge.
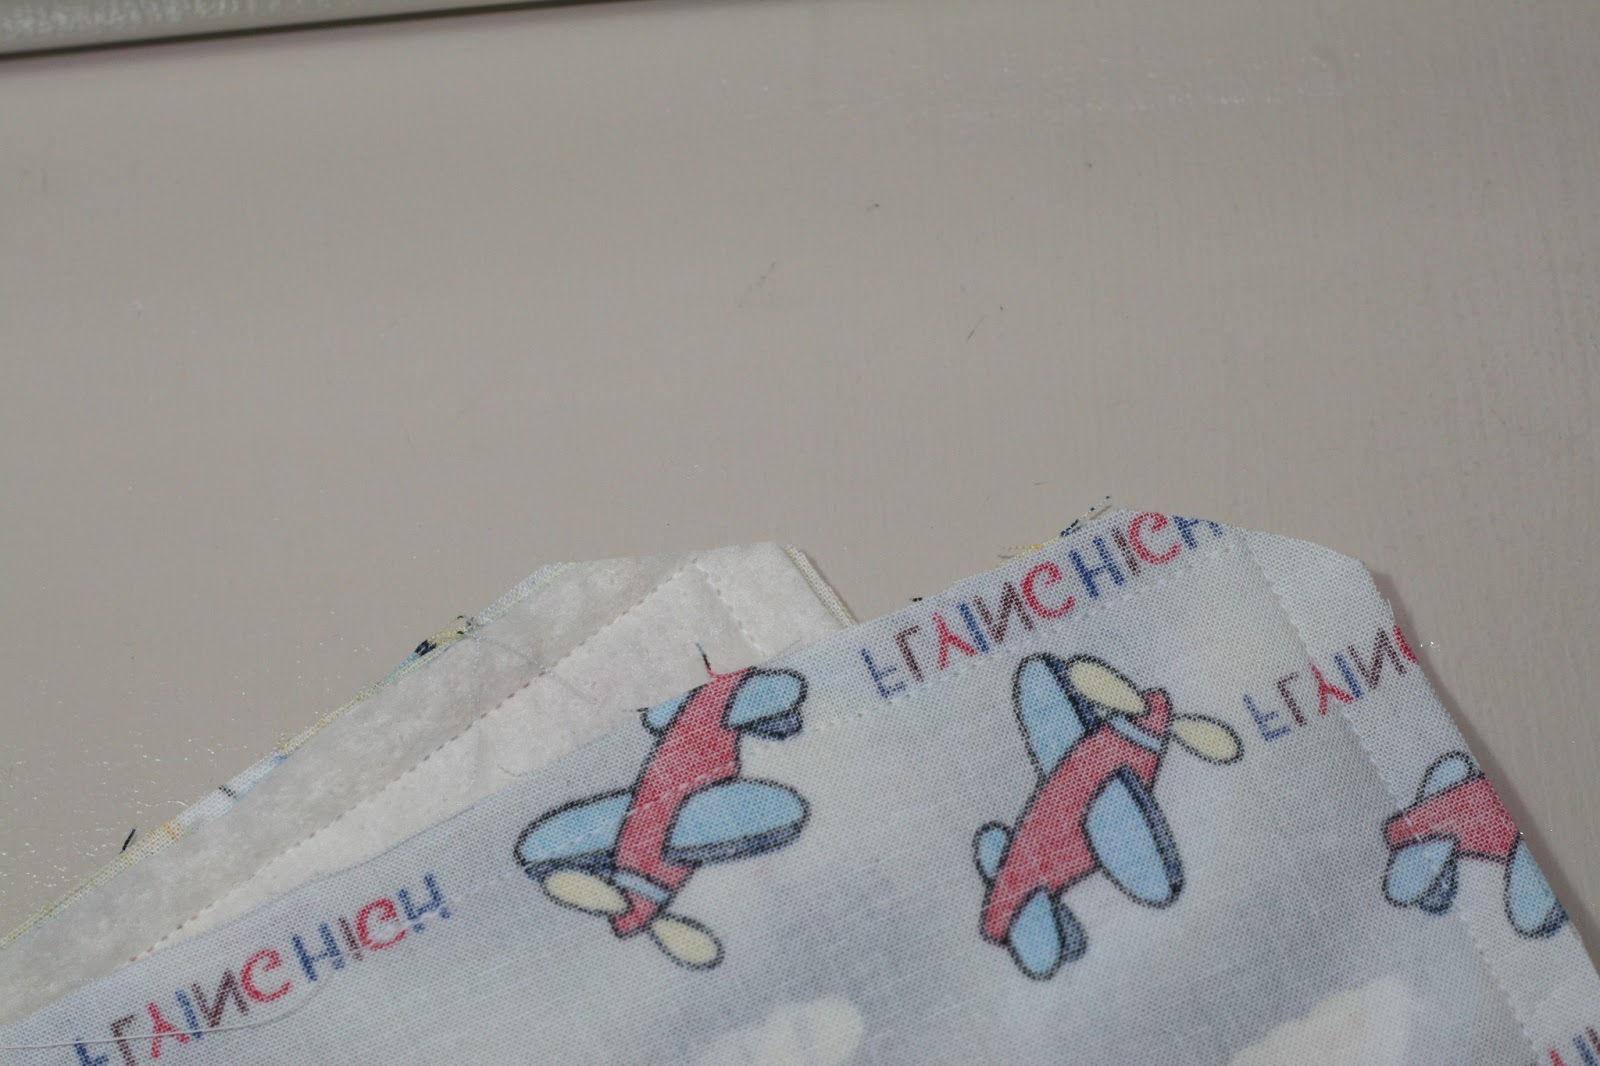
It was time to make a few massive buttonholes. Yes, those openings on the liner to pull the straps through and hook them up are nothing else but massive buttonholes! I only have a four step buttonhole option on my machine. Even so, I don't think making buttonholes is scary.

I placed the liner in such a way that the top of my future buttonhole was right under the needle and sewed along the line.

Ta-da :) I repeated for each remaining strap opening.

Placed pins at the end of each buttonhole and cut the buttonholes using my seam ripper and scissors.


Done :) Super easy, super cute :) Here is a lovely reversible pram liner I made for my wonderful friend.
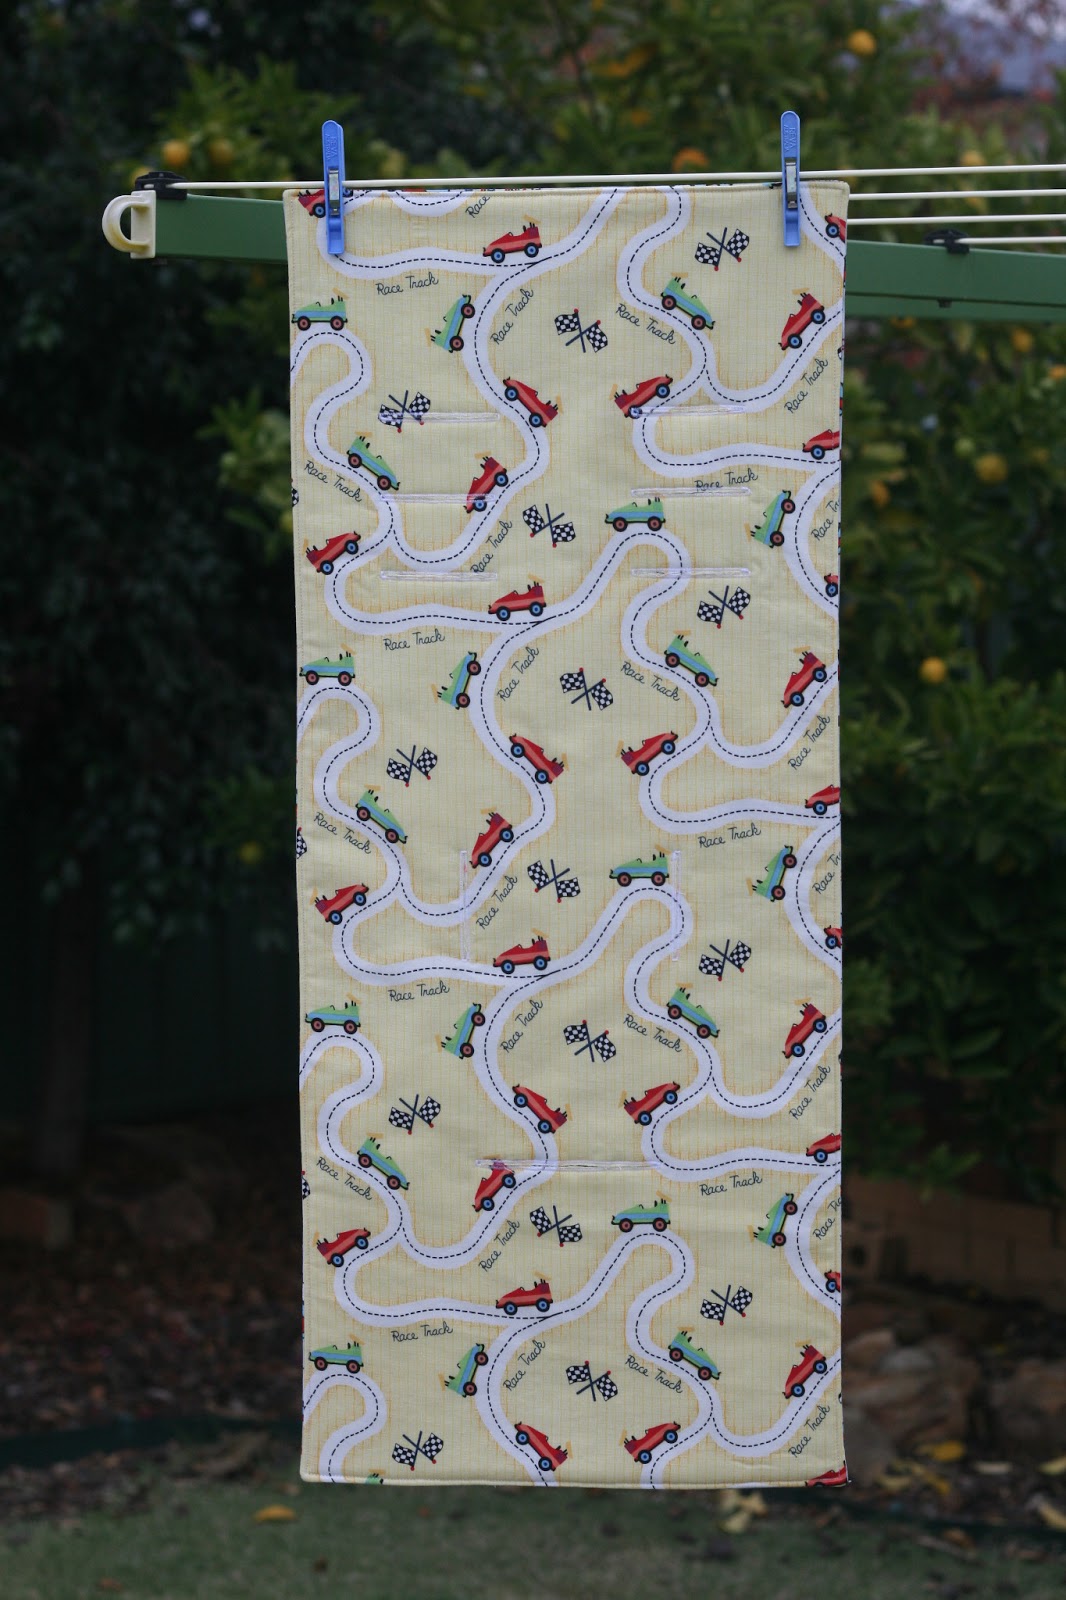

I think cleaning ice cream off the pram seat is going to be a much easier task now ;)
Please let me know if you make a pram liner or two using my hints. I would love to hear from you and have a look at the pictures (if you take pictures of your creations). I would appreciate a link back to this tutorial should you choose to use it.

So smart! I never thought to make one for my son's seat! He's quite messy too! I will have to put this on my to-sew list! Love the fabrics you used too!
ReplyDeleteHi Julia, thank you for popping over :) I think we all have a few funny and a number of horror stories involving prams and food :) How long is your to-sew list? Mine could probably reach from here to Moscow haha
DeleteNice one Jenya. My pram liners are still going strong - have been using the same ones for two years...that reminds me, they need a wash!!
ReplyDeleteHi Suz, thank you for popping over :) I love your pram liners! Two years of constant use def shows they are great quality! Washing... Let's not talk about it - our laundry basket is overflowing! haha
DeleteMaking the muslin first has paid of in giving you a pram liner that fits perfectly, Jenya!!! Wish I'd thought of this when my kids were little.
ReplyDeleteThank you Pam :) I wish I bought a sewing machine while I was still on maternity leave... I could have made so many cute things for my little girl while she was a baby... including a pram liner :)
DeleteGreat tutorial, thanks so much for sharing!
ReplyDeleteIm new to sewing and have a quick question. The batting keeps getting caught up and wont let me sew directly onto it. What am I doing wrong?
Thanks so much, I cant wait to make one of these!
Hi,
DeleteThank you for the question. Personally I have not had this problem before. What batting are you using? I didn't use a walking foot when I made the liner in the photos, but maybe using a walking foot could help? Is the batting on the top or at the bottom? I had batting at the bottom, under two layers of fabric. I also looked up a few ideas on the internet, and here are a few good suggestions - http://www.generations-quilt-patterns.com/sewing-on-naked-batting.html. Please let me know if you would like more ideas. I am pretty new to sewing, too :) but I am sure we will be able to find a solution :)
Hi Jenya,
ReplyDeleteThanks for the great pram liner tutorial. Using a light fabric to work out the initial shape was a great idea that would not have occurred to me. I made two liners and now feel like I have master button holes considering each liner required 7 button holes. I am now eagerly awaiting my baby to arrive to use the pram.
HI Jenya! I am going to make one using your pattern! I'll have to post a picture once I am done!!
ReplyDeleteThank you Vanessa :) I would love to see your version!
DeleteJenya
ReplyDeleteWould you still have your pattern. Would you be able to give me dimensions for the straps, i dont have a pram yo measure and my daughter is having twins jn 3 weeks; I would love to make her some of these. She is buying the baby jogger nmini gt double. Love your liners fabrics are lovely
Cheers Jen
Hi Jennifer, I can give you the dimensions I have but they might not be right for your daughter's pram. Baby Jogger's mini prams have smaller seats. This liner was made especially for a City Select pram. I have a City Elite, and the straps are in completely different spots. Still, happy to send you the dimensions. Can you pls flick me an e-mail and I will reply a little later (my daughter's cars apparently want to play hide and seek hehe)?
DeleteThanks for the wonderful tutorial. It was easier to make than I thought.
ReplyDeleteOH I am glad to hear it worked for you :) Thank you!
DeleteHi Jenya, thank you for your great tutorial. I gave it a go tonight. So happy with my linner.
ReplyDeleteI made a pattern and marked the strap holes then cut them. Then on my fabric i marked them with a patchwork pen. (Washes off).
I have 3 more cut out ready to go
Thank you very much for letting me know :) I hope the young rider/s will enjoy the liners :)
DeleteHello! I know this blog post is a couple of years old but I found it useful for the pram liner I am making. So, thank you for this tutorial! I did make a template using scrap fabric then with baking paper since I wanted rounded corners and a more custom fit. I also made matching shoulder strap pads and bumper bar cover with the leftover fabric and wadding.
ReplyDeleteHi
ReplyDeleteI cant work out how to get my 1 step buttonhole to go any larger then biggest setting and its not large enough for the side and middle buckle to feed through that do bub up.. any tips ?
OH sorry I have no experience working with a one step buttonhole. Would it be possible to use a buttonhole function with a different foot on your machine? I can do it on mine.
DeleteI did it! a friend is going to help me do the button holes but I'm pretty pleased with what I've done so far because I don't normally sew at all! thanks for sharing your template. it was really helpful.
ReplyDeleteThanks for this idea! I love the design and will be sharing your link in my newsletter.
ReplyDeleteMachine Embroidery Digitizing
I was thinking of sewing together four layers: top layer of fabric, towel, waterproof cot liner, bottom layer of fabric. I have these things on hand and it might be great for spills and toilet training. But would a machine handle the thickness? And I'm not sure how to edge the holes
ReplyDelete